
Furoshiki cloths are a great way to wrap any item regardless of its size and shape. Originally from Japan dating back to centuries ago, these square-shaped decorative fabrics were used to carry belongings and wrap gifts. A perfect alternative to paper gift wrappers since the recipient can reuse it for whatever purpose they may desire.
Fabric scraps can be repurposed into furoshiki wraps and the ones from ANTHILL are ideal for the beautiful patterns of the heartwoven fabrics. ANTHILL also offers ready made furoshiki wraps in various colors and sizes. To create this project, all you need to do is prepare your fabrics and get to working on the Furoshiki inspired wrapping techniques.

Furoshiki Weave Wraps
₱445.00-₱1,299.00Fabrics come in varying sizes, colours, and type of fabrics.
VIEW PRODUCT
SECTIONS
Furoshiki Look 1: Big Bow Technique
Furoshiki Look 2: Basic Knot Technique
Furoshiki Look 3: Hydrangea Technique
Furoshiki Look 4: 4 Ties Technique
Furoshiki Look 5: Twisted Handle

What You’ll Need:
- Scrap Fabric (Small Size - 17”x17”) and (Medium Size - 27”x27”) - Comes in Squares
- Dried Flowers with stem (2-4 pcs small) (optional)
- Transparent Rubber Band (or any available color)
- Fabric Scissors (for trimming)
- Fabric Chalk (optional)
PRO TIP: Create a 17”x17” and 27”x27” template on a manila paper and cut it. Once you need to cut the scrap fabrics, place the template on top and pin it in place to avoid wonky lines when tracing the template. Use fabric chalk to trace the shape of the template on the fabric.
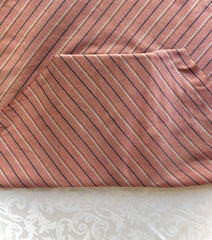
Furoshiki Look 1: Big Bow Technique
- Place the fabric in a diamond orientation with the ends facing towards you. Put the gift in the center.
- Starting with the corner closest to you, bring the fabric over (the box) and tuck it under the box. Bring over the remaining corner by folding it in again and make sure the folds land in the middle of the box.

- Pinch in the two sides and bring it on up. Tie and knot on the top.

- After tying, take each corner and fluff them out a bit. Adjust the size of each side of the bow accordingly. There you have it, a fabric wrapped gift with a big bow accent that is sure to catch anyone’s attention.


PRO TIP: To secure the first tied knot in place, feel free to use small safety pins underneath the knot to attach it to the fabric.
Furoshiki Look 2: Basic Knot Technique
- Place the fabric in a diamond orientation with the ends facing towards you. Put the gift in the center.

- Starting with the corner closest to you, bring the fabric over (the box) and tuck it under the box.

- Then grab the opposite corner and give it a fold before placing it over the fabric for a neater look.

- Then for the two sides, gather them in your hands to form into corners and lift. Then on top, just tie a knot, you can do a double knot if you don't want flappy looking ribbons.

- Now you have your basic knot wrapped gift.


PRO TIP: To add an additional flair to your wrap, place some dried flowers in between the knots or behind the knots.

Furoshiki Look 3: Hydrangea Technique
- Place the fabric in a square orientation (straight edge facing you) and put the gift in the middle.

- Bring the fabric over (the box) and tuck it under the object. Bring over the remaining corner by folding it in again and make sure the folds land in the middle of the box.

- Pinch the two sides inwards and hold it. Lift both sides of the fabric and let it meet in the middle.
- Secure it at the base by using a transparent rubber brand/any rubber band with complementing colors to the fabric. Tie it together using the rubber band.
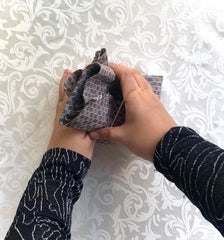
- Unfold the fabric on top as much as possible, creating a little fabric explosion on top. There you have it, a hydrangea inspired fabric wrap.


Furoshiki Look 4: 4 Ties Technique
- Place the fabric in a diamond orientation with the ends facing towards you. Put the gift in the center.
- Grab your first pair of corners in the left and right sides. Tie them right together.

- Then grab the remaining two corners. (Make sure that the first two corners tied together are in the middle.) and tie them together.

- Go back to your first pair of corners and tie a knot. Finally grab your second pair and tie one last knot for the top.

- There you have your gift, wrapped using the 4 ties fabric wrapping technique.


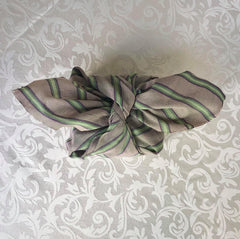
Furoshiki Look 5: Twisted Handle
- Place the fabric in a diamond orientation with the ends facing towards you. Put the gift in the center.

- Starting with the corner closest to you, bring the fabric over (the box) and tuck it under the box.
- Then grab the opposite corner and give it a fold before placing it over the fabric for a neater look.

- Then for the two sides, gather them in your hands to form into corners and lift. Tie it together to secure it in place.

- Instead of tying it again one last time to create a smaller corner, bring one end of the corner under and then tuck the excess corners into the neighbouring loop. Same goes for the other corner and tuck the loose end into the neighbouring loop.

- Once both corners have been tucked, it is time to admire your twisted handle technique on a fabric.


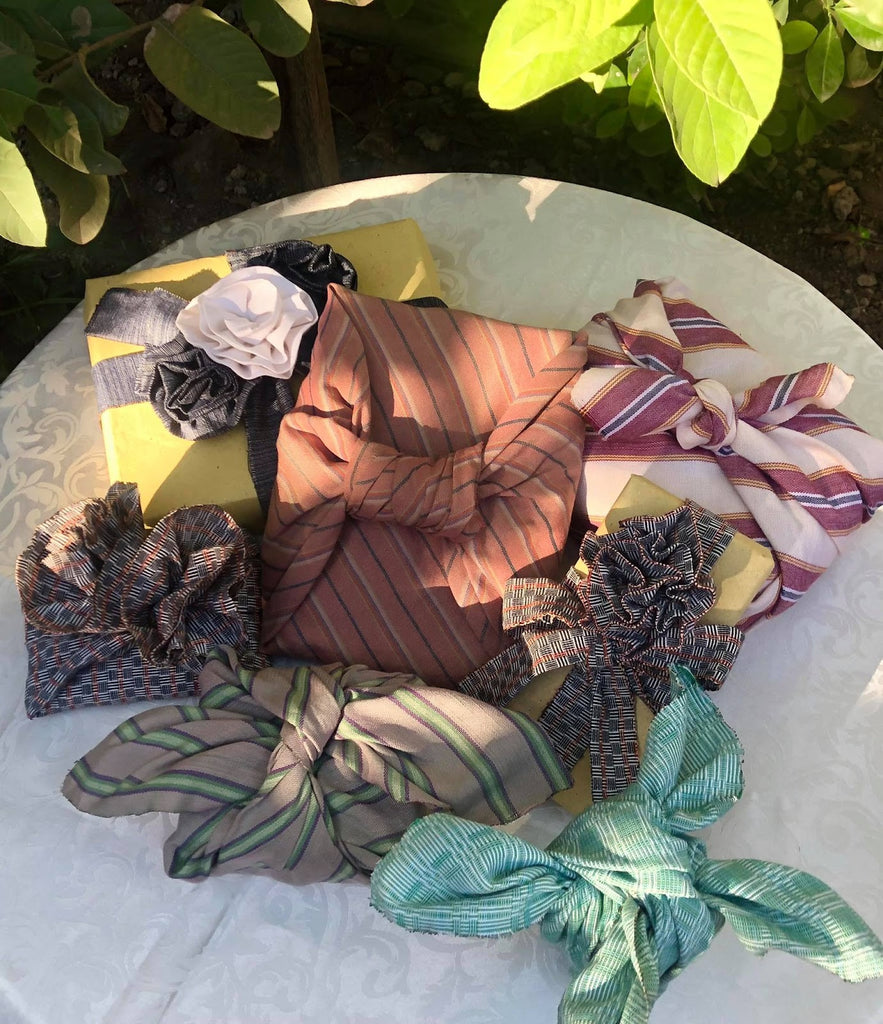
FINAL OUTPUT


These Furoshiki Wraps are so versatile that you can use them for various items in different shapes and sizes. Knowing the different techniques can help you identify which ones are better suited for each item you want to wrap.
You can purchase our Furoshiki Wraps on our store! Share how you wrap your gifts with us by tagging us on @anthillfabric and use the #ProudWeaveCrafter #ProudWeaveWearer
Furoshiki Weave Wraps
₱445.00-₱1,299.00Fabrics come in varying sizes, colours, and type of fabrics.
VIEW PRODUCT
Leave a comment