
| Proud Weave Crafter |
Silvana de Dios
|
I made a promise to myself that I would try to be as productive as possible during quarantine . However, finding activities that sustained my interest seemed to be far and few between. After many failed hobbies, I fell in love with sewing which taught me fundamental skills and perpetuated my creativity. Doing this project was so exciting! I was not only able to apply my new skills, but I used such unique fabric scraps which elevated my tote bag to a whole new level!
The beauty of this project is that you can have the freedom to do whatever design you like! Even if you’re a beginner or advanced sewer, creating stand-out designs is so simple. I mean I’ll be honest, I have failed at some simple sewing projects but this DIY tote bag seemed to have a 100% success rate and ended up being the best thing I’ve sewn!
At the end of this project, I was so happy to have a tote bag of my own especially since I had i always borrowed my sisters’ tote bag. Not only do I now have a versatile and durable bag in my closet, but I also have something that is one of a kind.
If you want to do something simple yet exciting I encourage you to create your own one of a kind tote bag using unique, beautiful, and our very own handwoven fabrics!
 What you’ll need:
|
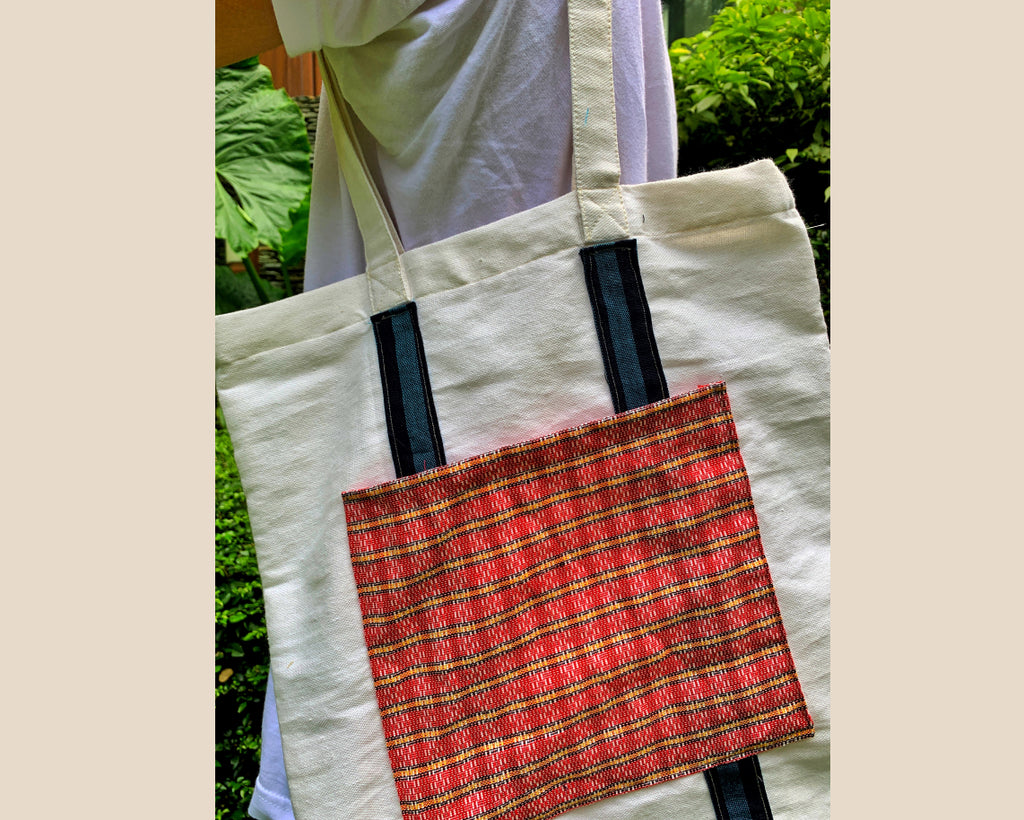
(1) Choose your favorite ANTHILL weaves. You can pick any of your favorite colors or styles!
(2) Cut one piece of 34cm x 34cm weave square and four pieces 4.5cm x 65cm weave strips
(3) Fold in the edges of the strip and begin sewing on both sides of the tote bag using a straight stitch
Pro Tip: Use tailors chalk to mark a vertical line to keep the strips straight
(4) Using a straight stitch sew three sides of the square weave, keeping the top open to act as a pocket
Pro Tip: Fold the top side of the pocket before sewing it to the tote bag to avoid loose threads
(5) Cut any loose threads that are coming out of the weave strips and squares


| BEFORE YOU START: If you’re like me, you’re going to want to dive right in without planning anything in advance. BUT, for a project like this, you’re going to want to plan ahead to make sure that your bag looks as beautiful as possible. My biggest advice for you is to mark out where all your strips and squares should be to prevent any crooked lines. If only I listened to this advice earlier I would have avoided the painful experience of thread ripping all of my har work. |
Congratulations!
You are now a Proud Weave Wearer and the proud owner and maker of your very own one-of-a-kind patchwork bucket hat.
HOPE YOU HAVE FUN WITH IT! We’d love to see your version of the patchwork bucket hat — Share your completed projects and designs with us by tagging us on @anthillfabric and use the #ProudWeaveCrafter #ProudWeaveWearer
Leave a comment